
A complete venue styling workflow runs across three phases — preparation, day-of session, and post-production — and, when followed consistently, it turns a single shoot into months of marketing assets ready for your Adelaideweddingvenues listing, social channels, and paid campaigns. A three-phase approach is the recognised standard for venue marketing shoots because it reduces on-site rework and keeps deliverables usable across every platform.
- Phase 1 — Preparation: brand direction, configurations, vendor coordination, and pre-shoot tasks
- Phase 2 — Day-of session: time-blocked run sheet, shot order, and format capture
- Phase 3 — Post-production: file naming, deliverables, rights, and publishing
Start today by drafting your shot list using the templates in this guide, then book your photographer with a confirmed run sheet in hand.
Key takeaways
A complete venue styling workflow — preparation, day-of session, and post-production — turns one shoot into a three-month content bank that powers listings, social, and paid campaigns.
| Point | Details |
|---|---|
| Three-phase structure | Preparation, day-of session, and post-production reduce rework and keep deliverables usable across platforms. |
| Hero shots first | Capture wide interior frames at the start of the shoot while the space is pristine and light is consistent. |
| Three configurations | Stage ceremony, banquet/reception, and corporate layouts to show versatility and attract multiple booking types. |
| File naming and specs | Consistent naming and platform-specific exports prevent errors when marketing teams use files weeks later. |
| Adelaideweddingvenues listing | Upload your full photo set to your Adelaideweddingvenues profile using the venue profile optimisation checklist to maximise enquiries. |
What does a venue styling workflow actually cover?
The phrase “venue styling workflow” is sometimes used loosely online to describe décor planning for couples. Here it means something specific: the operational process venue owners and managers follow to stage, photograph, and prepare their property for listings, open days, and marketing. Every section below is written for that purpose.
Phase 1: what to prepare before the photographer arrives
Strong shoots begin weeks before the camera arrives. The first task is declaring your brand direction — are you primarily targeting weddings, corporate events, or social functions? That decision shapes every shot choice. A ceremony-focused venue needs a different hero frame than a corporate theatre space, and your shot list should connect directly to the layouts that convert to bookings, not just the prettiest corners.
Practical pre-shoot tasks matter just as much. Walk every room and remove clutter, clean windows, fix loose signage, confirm power access for lighting rigs, and identify your hero architectural features — the ceiling, the view, the entry statement. These are the frames that will carry your listing for years.
Plan three configurations to show versatility
Staging multiple high-demand configurations demonstrates adaptability to prospective clients browsing your listing. Aim for at least three:
| Configuration | Key props and setup | Primary use |
|---|---|---|
| Ceremony | Chairs in rows, aisle, floral arch or focal point | Wedding listings, bridal directories |
| Banquet/reception | Round tables, linen, centrepieces, place settings | Wedding and gala listings |
| Corporate/theatre | Rows or boardroom layout, AV, minimal décor | Corporate and conference listings |
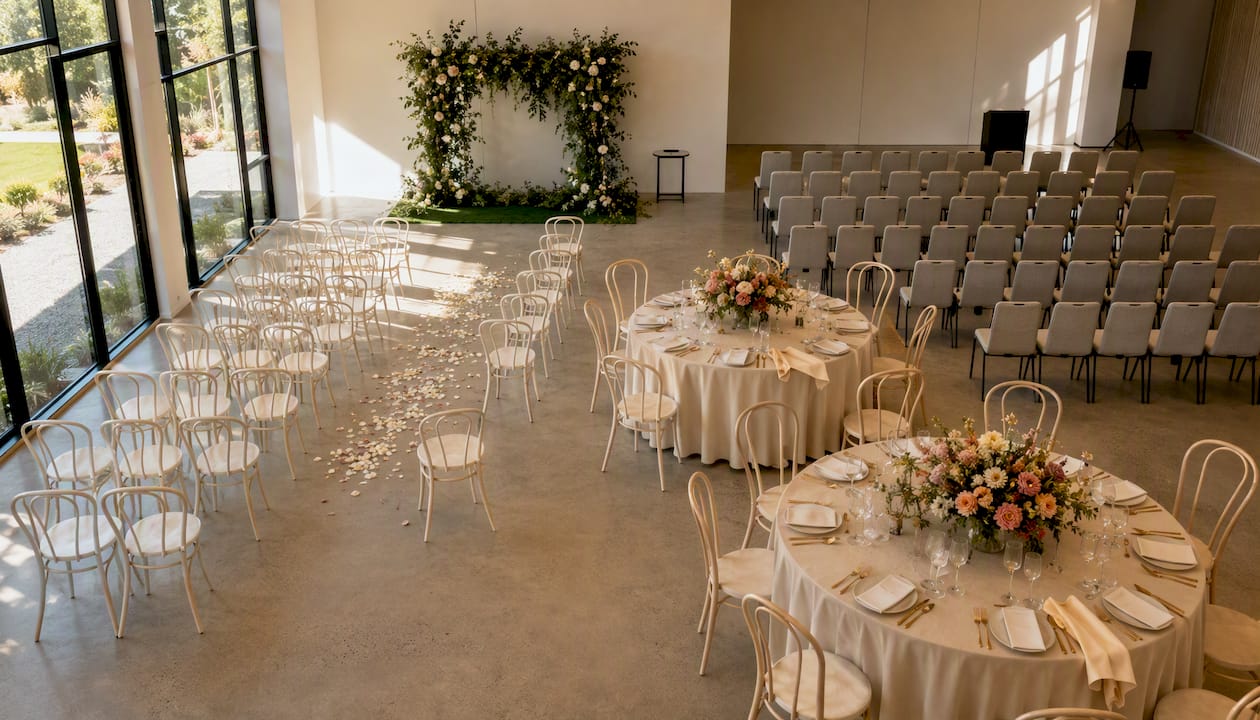
Each configuration should be photographed before moving to the next. Resetting mid-shoot wastes time and risks inconsistent lighting.
Vendor collaboration and cost-sharing
Inviting a stylist, florist, or furniture hire company to contribute to a styled shoot lowers your staging cost and extends your reach. Collaborating with vendors for styled shoots reduces outlay and amplifies cross-promotion when vendors tag the venue in their own posts. Agree in writing before the day who owns the images, how credits will appear, and whether each party can use the files commercially.
Pro Tip: Schedule a dedicated on-site assistant for the shoot day. Moving furniture, fluffing cushions, and clearing stray cords requires someone focused entirely on staging so the photographer can stay behind the lens.
Phase 2: how to run the shoot day efficiently
Stick to a time-blocked schedule and capture your widest hero frames first. Once natural light shifts or the space is disturbed by foot traffic, those frames are gone. A detailed run sheet with a clear shot order improves deliverable reuse and prevents missed shots.
Sample time-block run sheet
- 7:00–8:00 AM — Arrive, final staging check, lighting rig setup
- 8:00–9:30 AM — Hero interior wide shots (all three configurations)
- 9:30–10:30 AM — Ceremony setup detail shots and focal point close-ups
- 10:30–11:30 AM — Reception/banquet layout, table details, centrepieces
- 11:30 AM–12:30 PM — Outdoor views, entry, parking, garden or terrace
- 12:30–1:30 PM — Detail shots: glassware, signage, bridal suite, catering displays
- 1:30–2:30 PM — Staff and action shots, behind-the-scenes frames
- 2:30–3:30 PM — Golden hour exteriors and any remaining interiors
Shot order and format checklist
Work through this sequence for each configuration:
- Hero interior wide (horizontal, 16:9)
- Ceremony focal point (vertical, 4:5 for Instagram feed)
- Reception layout overview (horizontal)
- Outdoor views and entry (both orientations)
- Detail shots: table settings, florals, signage (square for grid posts)
- Staff/action and behind-the-scenes frames
- Short video snippets and Reels-format verticals (9:16)
Capture both vertical and horizontal orientations for every hero frame. Platform requirements differ — Instagram Stories and Reels need 9:16, feed posts favour 4:5, and web banners need wide 16:9 crops.
Pro Tip: Review a handful of test frames every 20–30 minutes. Catching a focus issue or a distracting background element early saves you from repeating the same mistake across an entire configuration.
Phase 3: file organisation and getting images published
Consistent naming and deliverable templates save hours when marketing teams go to use files weeks after the shoot. A disorganised folder of 400 images named “DSC_0001” is effectively unusable without significant extra work.
Recommended file-naming template
Use this structure: [VenueName]_[Config]_[Orientation]_[Usage]_[Date]
Example: GardenHall_Ceremony_H_WebBanner_20260315.jpg
Deliverables table
| Asset type | Resolution | Aspect ratio | Format | Primary use |
|---|---|---|---|---|
| Hero web banner | 2400 × 1350 px | 16:9 | JPEG | Website header, listing hero |
| Instagram feed | 1080 × 1350 px | 4:5 | JPEG | Feed posts |
| Story/Reel cover | 1080 × 1920 px | 9:16 | JPEG/MP4 | Stories, Reels |
| Directory thumbnail | 800 × 600 px | 4:3 | JPEG | Adelaideweddingvenues listing |
| Print brochure | A4 | Variable | TIFF/PDF | Printed collateral |
Record usage rights and model release status alongside each file. A simple spreadsheet column noting “model release signed — Jane Smith, 15 March 2026” protects you if a platform or client queries usage later. Track engagement metrics — saves, profile visits, and enquiry spikes — against the dates you publish new images so you can measure which assets drive bookings.
Reusable shot-list templates for Adelaide venues
These lists are designed to be handed directly to a photographer or venue staffer. Adapt them to your space and tick off as you go. For venue photography preparation steps including decluttering and brand alignment, the Adelaideweddingvenues photography guide covers the full pre-shoot checklist.
Must-get shots when time is limited (60–90 minutes on site)
- Front door and entry statement
- Hero interior wide — largest or most distinctive room
- Ceremony focal point (arch, altar, or feature wall)
- Reception table layout overview
- Outdoor view or garden/terrace
- Bridal suite or preparation room
- Parking and arrival approach
Full shot lists by configuration
Ceremony: aisle wide, focal point close-up, chair detail, floral arch, natural light through windows, entry doors open
Reception/banquet: full room wide, individual table close-up, centrepiece detail, place setting, bar or beverage station, dance floor
Corporate/theatre: full room with AV setup, lectern or stage, seating rows, breakout area, signage
Hero architectural: ceiling feature, staircase or entry hall, exterior facade, unique structural detail
Details: glassware, menus, signage, candles, florals, linen texture
Pro Tip: Map natural light across your venue before the shoot day. Rooms that face east are best in the morning; west-facing spaces come alive in the late afternoon. Schedule golden hour exterior shots for the last 60 minutes of the day.
How to use your shoot assets across listings and a 90-day plan
Long-life hero assets — wide interior shots and architectural features — should power your listings and paid ads because they stay relevant for years. Short-life content — real wedding frames, behind-the-scenes clips — drives engagement and discovery on social but has a shorter shelf life.
Platform asset map
| Platform | Best asset type | Notes |
|---|---|---|
| Adelaideweddingvenues listing | Hero interior, all three configs | Upload highest-res JPEG available |
| Google Business Profile | Exterior, entry, hero interior | Refresh quarterly |
| Instagram feed | 4:5 vertical, detail shots | Mix hero and real wedding content |
| Instagram Reels | 9:16 video, BTS clips | Short-life content performs well here |
| Vertical hero and detail shots | Long-life; pins resurface for months | |
| Paid ads | Hero wide, exterior | Test multiple crops; A/B test captions |
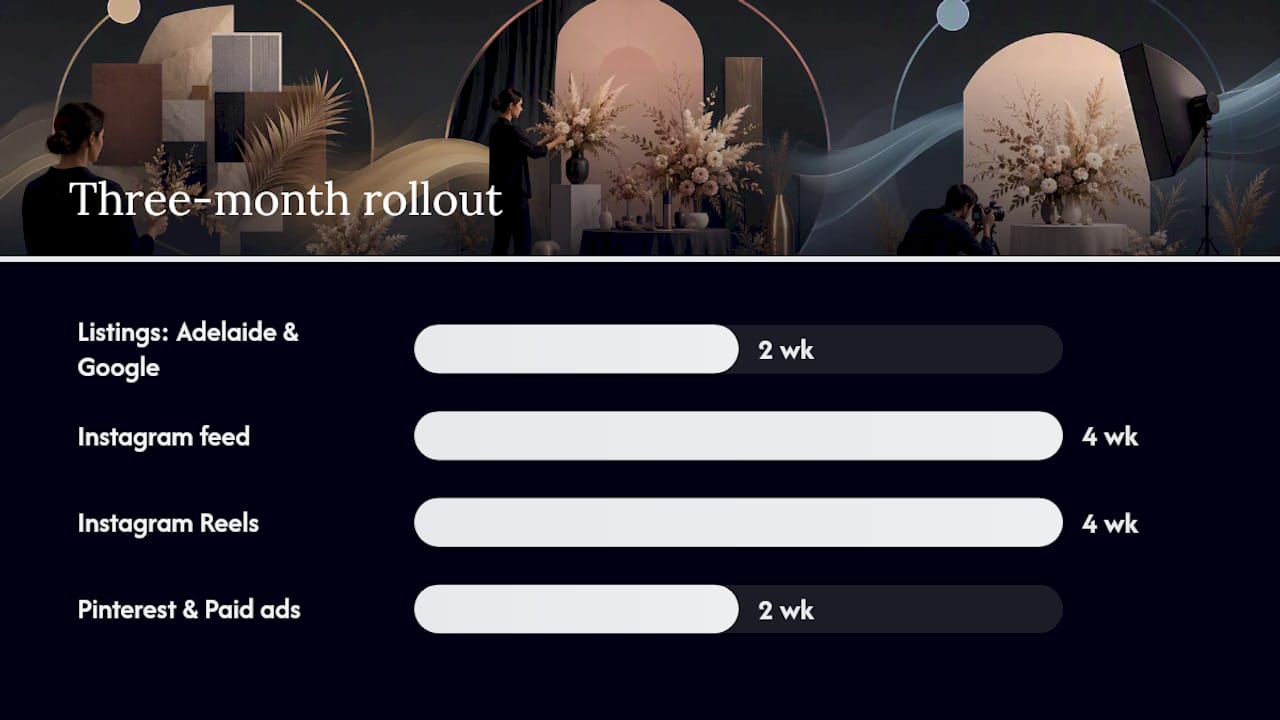
A three-month content calendar from one shoot might look like: weeks 1–2 publish hero interiors on the listing and Google; weeks 3–6 roll out ceremony and reception stills on Instagram; weeks 7–10 release BTS Reels and vendor collaboration posts; weeks 11–12 refresh Pinterest boards and update paid ad creative.
Social platforms are central to venue discovery, with a high proportion of couples using Instagram to shortlist venues. Reels and feed posts used alongside listing optimisation tend to increase enquiry volume.
Pro Tip: Tag every vendor and collaborator in your social posts and agree on the tagging arrangement before the shoot. Tagging vendors in advance reduces friction and considerably increases cross-promotional reach.
Permissions, releases, and working with vendors
Agree usage rights and credits before the shoot — write it into an email or a simple one-page agreement. Verbal agreements create disputes; a written record protects everyone.
Model release and image usage checklist:
- Full name and contact of any person appearing in images
- Scope of use: commercial, editorial, social media, print
- Duration: perpetual or time-limited
- Credit line agreed: how the venue and vendors will be named
- Exclusivity: whether the vendor can use the same images independently
Vendor credit template for captions: “Venue: [Your Venue Name] | Florals: [Florist] | Styling: [Stylist] | Photography: [Photographer] | Listed on Adelaideweddingvenues”
For styled shoots where vendors contribute product or labour in exchange for images, document the barter arrangement in writing. Specify how many final edited images each party receives and the timeline for delivery.
Pro Tip: Send a one-page credit and usage summary to every collaborator the week after the shoot. It confirms what was agreed and gives vendors everything they need to post promptly, which multiplies your reach faster.
Technical export and delivery specs
Always deliver high-resolution masters plus platform-optimised derivatives, each labelled by usage. Sending a single large file and expecting a marketing team to crop it correctly for every platform is a reliable way to end up with blurry thumbnails on your listing.
Suggested folder structure:
/VenueName_Shoot_March2026
  /01_Masters
  /02_Web
  /03_Social
    /Feed
    /Stories
    /Reels
  /04_Print
  /05_Directory
Budget and schedule template for a styling shoot
Time estimate by shoot length
- Half-day shoot (4 hours): hero interiors, one configuration, outdoor views, key details — suits smaller venues or listing refresh shoots
- Full-day shoot (8 hours): all three configurations, full shot list, golden hour exteriors, BTS and video snippets — recommended for new listings or major marketing updates
Typical cost items
- Photographer (half-day vs full-day rate)
- On-site assistant (staging and logistics)
- Stylist or art director
- Furniture and prop hire
- Florals and consumables
- Models or talent (if applicable)
To reduce cash outlay, invite vendors to contribute in exchange for images. A florist who supplies centrepieces in exchange for five edited images saves you hire cost and gains portfolio content.
Scheduling checklist
- Confirm shoot date and photographer at least four weeks out
- Send run sheet to all collaborators one week before
- Confirm venue access, power, and parking two days before
- Brief on-site assistant on staging priorities the morning of the shoot
- Collect signed model releases and vendor agreements on the day
Why this workflow reflects real Adelaide venue expertise
Adelaideweddingvenues is maintained by wedding industry professionals, including photographers with in-depth knowledge of South Australian venues. The workflow in this guide draws on that local expertise — from understanding how Adelaide’s mix of heritage buildings, garden estates, and coastal spaces each present different lighting challenges, to knowing which configurations prospective couples actually search for on the directory.
Steven contributes to Adelaideweddingvenues content and has practical experience running venue shoots and listing optimisation across South Australia. The advice here is grounded in what actually works on the platform and in the local market.
Equipment and props checklist by styling phase
Phase 1 — Preparation:
- Lint roller, cleaning cloths, and a small toolkit for quick fixes
- Extension leads and power boards for lighting rigs
- Spare globes and candles for ambience shots
- Hire furniture confirmed and delivered the day before
Phase 2 — Day-of session:
- Camera body with wide-angle and standard lenses
- Tripod and remote shutter for interior wide shots
- Portable LED panels or reflectors for low-light rooms
- Props: table settings, florals, signage, linen samples
Phase 3 — Post-production:
- External hard drive for master file backup
- Colour calibration card (shot at the start of each configuration)
- Signed release forms and vendor agreement copies
Lighting setup and adjustments during the shoot
Mapping natural light across indoor and outdoor spaces before the shoot day is one of the highest-return preparation steps. East-facing rooms photograph best in the morning; west-facing spaces and outdoor terraces are at their warmest in the late afternoon.
For rooms with limited natural light, portable LED panels set to a daylight colour temperature (around 5,500K) produce clean, consistent results without the colour cast that mixed lighting creates. Avoid mixing tungsten and daylight sources in the same frame — it produces an orange-blue split that is difficult to correct in post-production.
During the shoot, adjust window blinds incrementally rather than fully open or closed. A partially diffused window acts as a large softbox, wrapping light around furniture and reducing harsh shadows on walls. Check the histogram on your camera after each configuration change rather than relying on the screen preview alone.
Post-production workflow and software recommendations
A clean post-production process starts with culling: remove duplicates, out-of-focus frames, and test shots before any editing begins. Adobe Lightroom Classic remains the standard for batch processing venue shoots — its synchronise settings function lets you apply a consistent colour grade across an entire configuration in minutes.
For retouching, Adobe Photoshop handles structural corrections such as removing temporary signage, correcting lens distortion, and cleaning up ceilings. Capture One is a strong alternative for venues that need precise colour control, particularly for heritage spaces with complex mixed lighting.
Export a full-resolution master first, then create derivatives for each platform using the specs in the deliverables table above. Skylum Luminar Neo includes AI-powered sky replacement and window pull tools that are useful for overcast Adelaide days when exterior shots lack contrast.
Virtual staging and 360-degree tours
Virtual staging — digitally adding furniture, décor, and lighting to an empty room — is a practical option for venues undergoing renovation or those that cannot afford a full styled shoot. Software such as Virtual Staging AI and RoOomy allows venue managers to upload a plain room photo and receive a furnished version within hours.
For 360-degree tours, a Ricoh Theta or Insta360 camera produces spherical images that can be embedded directly into a Google Business Profile or a venue website. Couples increasingly expect to walk through a space virtually before enquiring, particularly for destination bookings. A 360 tour of your ceremony space and main reception room, updated annually, reduces the number of site visits required before a booking decision.
Keep virtual assets clearly labelled as “virtually staged” or “indicative layout” to maintain trust with prospective clients.
One habit that makes this workflow repeatable
The single most useful habit a venue team can adopt is scheduling a quarterly mini-shoot — 90 minutes, one configuration, updated props — rather than waiting for a full annual shoot. Listings with recently updated images consistently attract more enquiries, and a quarterly refresh keeps your Adelaideweddingvenues profile current across seasons.
Start this week:
- Pull up your current listing photos and note which configurations are missing or outdated
- Draft a shot list using the templates in this guide
- Contact one vendor partner about a styled shoot barter arrangement
Tracking enquiry volume before and after uploading new images to your listing gives you a direct measure of the workflow’s impact. Most venues see a noticeable lift within the first four weeks of a profile update.
Your Adelaideweddingvenues listing is where the assets go to work
Completing a shoot is only half the job. The real return comes from getting those images in front of couples who are actively searching for venues like yours.
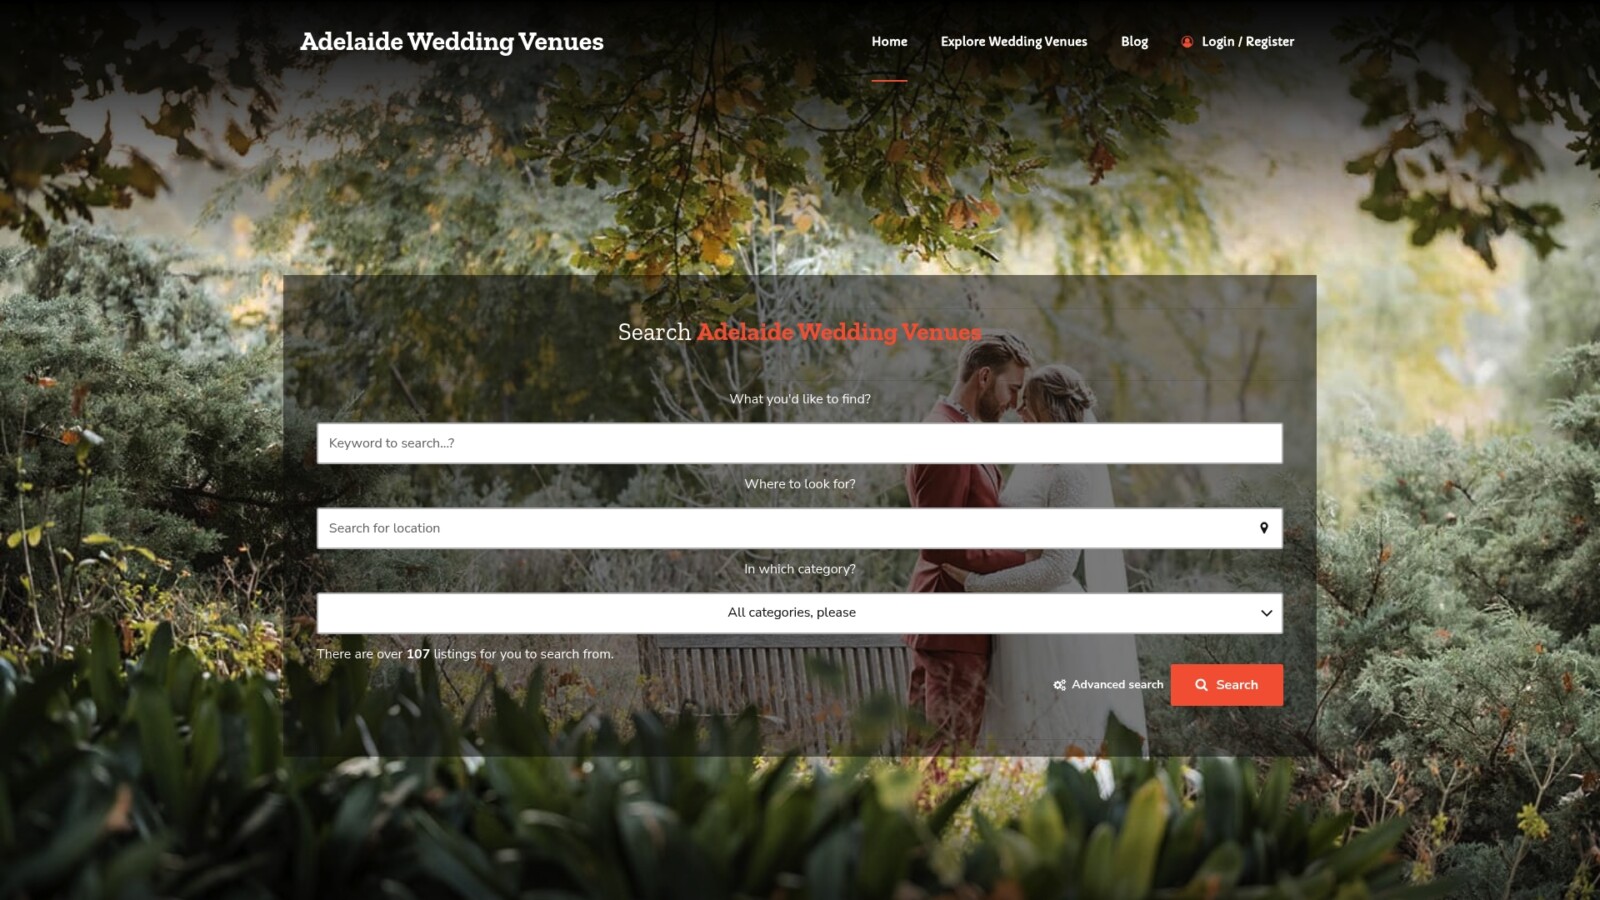
Adelaideweddingvenues gives South Australian venue owners a free listing in a searchable directory used by engaged couples and event planners across the region. A featured listing puts your venue at the top of relevant searches, with space for your full photo set across all three configurations, capacity details, and direct enquiry links. The platform is free to list and offers optional paid promotion for venues that want greater visibility. Use the venue profile optimisation checklist to upload your new assets correctly and make your listing as complete as possible. Couples browsing how to choose their ideal wedding venue will find your venue first when your profile is fully optimised.
Sources
The workflow in this guide draws on published guidance from hospitality photography studios, venue marketing specialists, and the editorial team at Adelaideweddingvenues. Key references include the Tripleseat EventUp photography guide, the Amplify Creative Lab content strategy resource, the Billy Boy Studio hospitality shoot checklist, and the Hawthorne Creative venue shoot guide. For local implementation, the Adelaideweddingvenues venue photography tips page and the venue profile optimisation checklist are the recommended starting points. Use the shot list templates and run sheet in this guide as your on-the-day reference.
- Photography tips for showcasing your event space online
- Venue event photography content strategy | Amplify
- The ultimate photo checklist before any hospitality shoot
- Wedding venue marketing agency | Merge
- 10 steps to nailing an original venue photo shoot
- A guide to using indoor and outdoor spaces to maximise natural light for photography
FAQ
What is a venue styling workflow?
A venue styling workflow is the step-by-step process venue owners follow to stage, photograph, and prepare their property for listings, open days, and marketing campaigns. It covers preparation, the shoot day, and post-production file management.
How many configurations should a venue photograph?
Staging at least three configurations — ceremony, banquet/reception, and corporate/theatre — demonstrates versatility and gives prospective clients the visual evidence they need to shortlist your venue.
What file formats should venues deliver to their marketing team?
Deliver JPEG masters at full resolution plus platform-specific derivatives: 2400 × 1350 px for web banners, 1080 × 1350 px for Instagram feed, 1080 × 1920 px for Stories and Reels, and 800 × 600 px for directory thumbnails such as your Adelaideweddingvenues listing.
How long does a full venue styling shoot take?
A half-day shoot of around four hours covers one configuration and key details. A full-day shoot of eight hours allows for all three configurations, golden hour exteriors, and behind-the-scenes video content.
Do venues need model releases for shoot images?
Any person who appears identifiably in images used for commercial purposes should sign a model release before the shoot. Record the signed release alongside the relevant image files for straightforward reference later.
