
Styling a wedding venue well comes down to one ordered sequence: choose your style and palette, inspect and measure the space, draw a floor plan, build a run sheet, pack and label per-area boxes, install large items first, dress the tables, then run your 60/30/15 final checks before guests arrive. Follow that order and the day runs smoothly. Skip a step and you will feel it.
Here is the compact run-sheet overview you can screenshot now:
- Style and palette — lock in your vibe, two colours, and one hero piece (8–12 weeks out)
- Venue inspection — photograph, measure, and document everything (6–8 weeks out)
- Floor plan — draw ceremony footprint, reception layout, and service routes (4–6 weeks out)
- Run sheet — map bump-in, event, and bump-out times with named contacts (4 weeks out)
- Pack and label — fill per-area boxes and match labels to the floor plan (1–2 weeks out)
- Large items first — rigging, drape, uplights, then furniture (bump-in day, first block)
- Tablescapes — linen, chargers, place settings, centrepiece, candles, namecards (bump-in day, second block)
- Final walkthrough — 60/30/15 checks, guest flow, sign-off (day of event)
Key takeaways
Venue styling done well follows a single ordered sequence: style first, measure second, plan third, then install from large to small and finish with a structured walkthrough.
| Point | Details |
|---|---|
| Style before you shop | Lock in one vibe, two colours, and one hero piece before buying or hiring anything. |
| Measure and photograph the venue | Record ceiling heights, door widths, power points, and spacing before drawing any floor plan. |
| Install large items first | Rigging, drape, and lighting go in before furniture so nothing blocks access or gets damaged. |
| Use per-area labelled boxes | One box per zone, labelled to match the floor plan, lets volunteers work without asking questions. |
| Run the 60/30/15 checks | Walk the venue at 60, 30, and 15 minutes before guests arrive to catch and fix problems in time. |
How to style a venue step by step, starting with your vision
Pick one vibe and a single hero piece
The most common mistake couples make is collecting too many ideas. A moodboard with forty pins and six colour families produces a venue that looks busy rather than beautiful. The fix is simple: commit to one clear vibe (garden romance, modern minimalist, rustic warmth), choose two anchor colours, and identify a single hero piece that will anchor every photograph.
DIY wedding decor research consistently shows that weddings focusing effort on two or three statement pieces photograph better and feel more cohesive than those spread across many half-finished projects. Your hero piece might be a floral arch, a neon sign, a chandelier, or a dramatic table runner. Whatever it is, spend your best budget and your best time on it.
Building your moodboard: Use Pinterest or a simple folder of saved images. Pin only images where the overall feel matches your vibe, not individual products. When you have 20–30 images, look for the three elements that appear most often. Those are your non-negotiables. Everything else is optional.
Converting style into buy or rent decisions: Structural pieces (arches, drape, large lighting rigs) are almost always cheaper to hire than to build. Decorative items you will touch and personalise (centrepieces, signage, table accessories) are where DIY saves money. Realistic DIY planning for major items takes 8–12 weeks, so start building or ordering early.
Pro Tip: Choose a hero piece that reads well in a single photograph from five metres away. If it only looks good up close, it will not carry the room or your wedding album.
What should you record when you inspect the venue?
The measurement and photo checklist
A site visit without a checklist wastes the trip. Arrive with your phone, a tape measure, and a notepad. The goal is a complete photo inventory that vendors and DIY helpers can reference without needing to visit themselves.
Photograph every one of these:
- All entry and exit points, including service doors and loading bays
- Power points: location, quantity, and whether they are on separate circuits
- Ceiling height at the centre and at the edges (these often differ)
- Any fixed structures: pillars, beams, built-in bars, stages
- Stairs, ramps, and any access restrictions for trolleys or heavy equipment
- Natural light at the time of day your event runs
- Existing lighting rigs, tracks, or anchor points for hanging décor
- Outdoor areas, including weather shelter options
Measure and record:
- Room length and width, plus any alcoves or irregular sections
- Door widths on every entry point (critical for large furniture or floral installations)
- Distance from the ceremony area to the reception space if they share the venue
- Table-to-table spacing: practical guidance recommends leaving at least 36 inches (about 90 centimetres) between tables so guests and staff can move freely
- Stage or drop height for any hanging installations
- Distance from power points to your planned lighting positions
Label each photo with a short description and save them in a shared folder your florist, lighting supplier, and key helpers can access. This single folder prevents the most common vendor miscommunication: arriving on bump-in day to find the ceiling is two metres lower than expected.
How do you draw a floor plan everyone can follow?
A floor plan is not a design exercise. It is a communication tool. Every vendor, volunteer, and venue staff member should be able to pick it up and understand where everything goes without asking you a question.
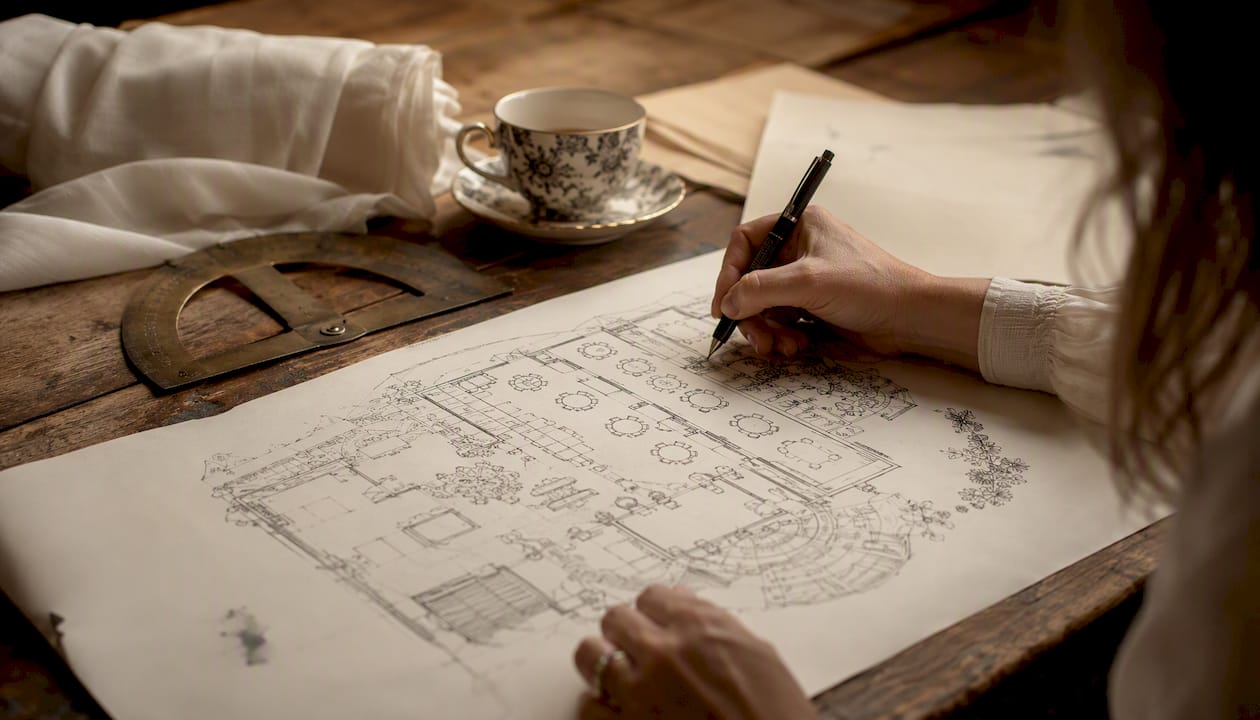
Start with the ceremony footprint. Mark the aisle width, the seating rows or chairs, the altar or arch position, and the photographer’s standing area. Add arrows showing the direction guests enter and exit.
Add the reception layout. Place each table to scale, number them, and show the head table or sweetheart table clearly. Mark the dance floor, the bar, the cake table, and the DJ or band position. Draw service routes as dotted lines so staff know where to walk without crossing the dance floor mid-service.
Numbered diagram system: Assign each table a number that matches your floor plan, your seating chart, and your packing boxes. Table 1 on the floor plan corresponds to Box 1 in your storage system. This cross-reference is what lets a volunteer find the right centrepiece for the right table without interrupting you.
Pro Tip: For awkward rooms with pillars or a long narrow shape, place your hero piece at the far end so it draws the eye down the length of the space. Pillars become features when you add drape or greenery; they become obstacles when you ignore them.
For help matching your floor plan to your venue’s actual capacity and table configurations, the venue capacity planning guide from Adelaideweddingvenues is a practical reference.
How do you build a supplier run sheet for bump-in to bump-out?
A wedding timeline should be divided into three clear blocks: bump-in, event time, and bump-out. Vendors and the venue need a written run sheet so everyone works in sequence rather than in each other’s way. A clear run sheet with named arrival windows and a day contact also cuts the risk of hidden charges from idle hire time or late pack-down.
Sample run sheet structure
| Time | Task | Assigned to |
|---|---|---|
| 8:00 AM | Venue access opens; lighting supplier arrives | Lighting hire company |
| 8:30 AM | Rigging and drape installation begins | Styling team / hire company |
| 10:00 AM | Furniture delivered and placed per floor plan | Hire company |
| — | Florals delivered; florist begins installations | Florist |
| 12:00 PM | DIY team begins tablescapes | Couple’s team |
| 1:30 PM | Cake delivered and positioned | Baker |
| 2:00 PM | Final walkthrough and photography sweep | Couple / coordinator |
| 2:30 PM | Venue opens to guests | All |
| — | Event ends; bump-out begins | All vendors |
| 12:00 AM | Venue clear | All |
Building your contact list:
- List every vendor with their mobile number and the name of the person arriving on the day.
- Add the venue’s day-of contact (not the sales coordinator — the person physically on site).
- Note each vendor’s confirmed arrival window and what they need from you on arrival (a key, a floor plan copy, access to a specific door).
- Distribute the run sheet to every person on the list at least one week before the event.
Pro Tip: Ask your hire company whether idle time between delivery and collection is included in the package or charged separately. Some packages allow the furniture to sit in the venue overnight at no extra cost; others do not. Knowing this before bump-in day prevents a surprise invoice.
For a detailed setup timeline framework, the wedding event setup process guide from Adelaideweddingvenues covers bump-in sequencing in practical detail.
What is the best packing and labelling system for venue setup?
The per-area box method
Sturdy storage boxes with a strict labelling system per area let volunteers and vendors find items quickly and avoid setup delays. The principle is simple: one box per zone, labelled to match your floor plan.
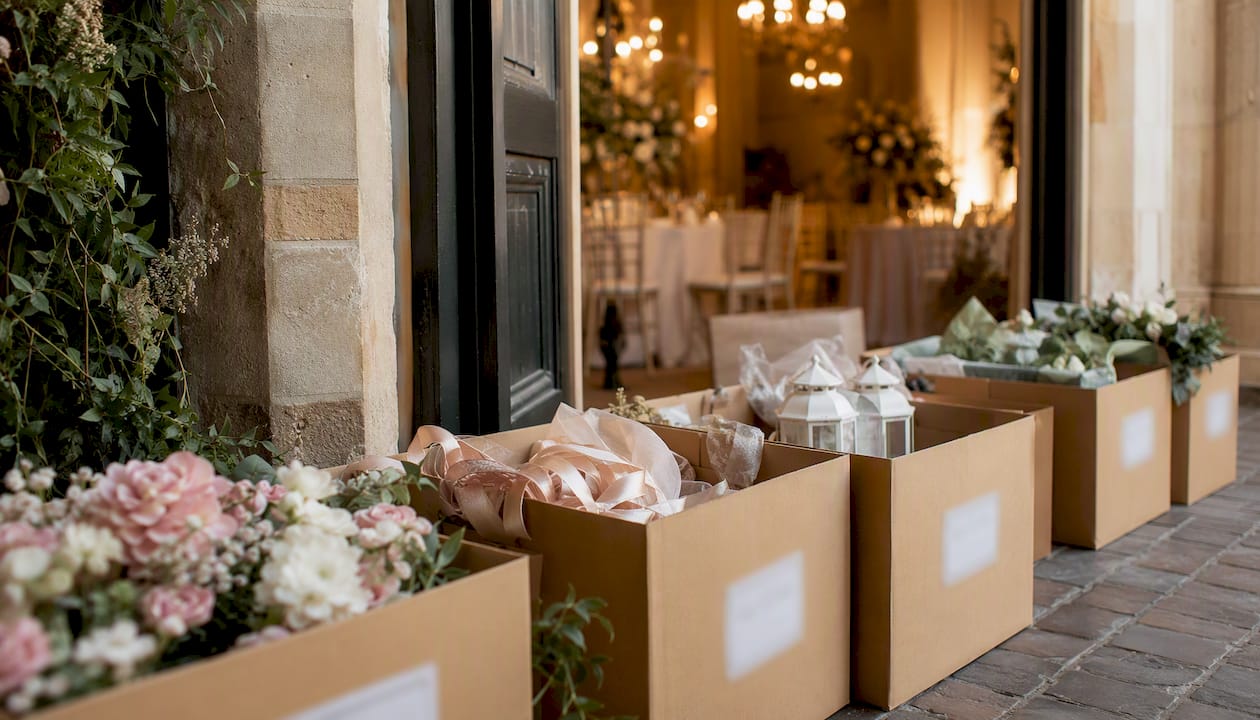
Ceremony box: aisle petals or cones, chair sashes or clips, ceremony programme holders, unity candle or sand ceremony items, aisle runner, spare pins and ties.
Reception table boxes (one per table): centrepiece components, charger plates, place cards, menu cards, votive candles, table number holder and card, any personalised items for that table.
Signage box: welcome sign, seating chart (rolled or flat-packed), directional signs, easels or stands, double-sided tape and command strips.
Lighting box: fairy light extensions, spare bulbs, cable ties, gaffer tape, timer plugs, remote controls for any battery-operated lights.
Cake and dessert table box: cake stand, dessert table signage, serving utensils, napkins, any decorative props.
Tools and spares box (keep this one with you at all times):
- Scissors and craft knife
- Gaffer tape and double-sided tape
- Cable ties in two sizes
- Spare batteries (AA and AAA)
- Safety pins and floral wire
- Zip ties and bungee cords
- A small first aid kit
- Permanent marker for last-minute labelling
Colour-code each box category with coloured tape on the lid and side so a volunteer can spot the right box from across a crowded loading bay. Write the zone name in large text on all four sides, not just the top.
Should you install large items before furniture and centrepieces?
Yes, always. Large structural elements must go in first because they require access to the ceiling, walls, and floor space that furniture will later block. Installing a chandelier or drape after the tables are set means working over guests’ place settings and risking damage to everything below.
Recommended install order:
- Rigging and hanging elements (chandeliers, floral installations, drape tracks)
- Wall-mounted or ceiling-mounted lighting (uplights, fairy light curtains, pin spots)
- Large structural pieces (arches, backdrops, ceremony structures)
- Furniture placement (tables, chairs, lounge furniture)
- Centrepieces and florals
- Table accessories and finishing touches
Lighting is the single most cost-effective way to elevate a venue’s décor, so it deserves priority in both your budget and your install schedule. Uplights placed before furniture arrives can be positioned precisely; placed after, they end up behind chair legs.
Safety checks before you start:
- Confirm the venue’s approved fixing methods in writing (no nails, no adhesive hooks above a certain weight, no open flames near fabric).
- Check the weight rating of any ceiling anchor point before hanging anything.
- For outdoor structures, confirm wind ratings and whether guy ropes or ballast weights are required.
- Never work above shoulder height on a ladder without a second person present to stabilise it.
- If a hanging installation exceeds 10 kilograms or requires drilling, engage a licensed rigger.
Pro Tip: Test every light fitting and remote control before the furniture goes in. Replacing a faulty bulb or chasing a loose connection is straightforward when the room is empty; it is genuinely difficult once 20 tables are dressed.
How do you dress tables quickly and consistently?
A repeatable tablescape sequence
Batch styling is the key to dressing many tables with a small team. Batching DIY tasks and testing one sample table first keeps costs manageable and produces consistent results across every table in the room.
Set up one complete test table before bump-in day. Photograph it from above and from a seated guest’s eye level. Share those photos with your helpers so everyone is working toward the same result.
The sequence for each table:
- Lay the linen and smooth out any creases before anything else goes on top.
- Place charger plates at each setting, evenly spaced.
- Add cutlery, glassware, and napkins per your place setting plan.
- Position the centrepiece at the centre of the table.
- Add candles or votives, checking they are stable and not close to any fabric edge.
- Place namecards and menu cards at each setting.
- Remove all packaging, price tags, and cable ties before moving to the next table.
Finishing touches checklist:
- Check every candle is at least 30 centimetres from any fabric, paper, or floral element.
- Confirm battery-operated candles are switched on and functioning.
- Straighten all chairs to the same angle.
- Remove any fingerprints from glassware with a clean cloth.
- Do a final check that table numbers are visible from the room entrance.
For catering coordination timing, particularly when confirming service routes and kitchen access with your caterer, the festive meal planning resource from Wild Foodz is a useful reference for event planners managing multiple vendors.
What should you check in the final 60, 30, and 15 minutes?
The 60/30/15 routine is a structured walkthrough that catches problems while there is still time to fix them. Run it in this order:
60 minutes before guests arrive:
- Walk the full venue with your run sheet and confirm every element is in place.
- Check sound: music playing at the right volume, microphone working for the ceremony.
- Confirm food timing with the catering team and note any changes to the service schedule.
- Verify all signage is visible and correctly positioned (welcome sign, seating chart, directional signs).
- Check bathrooms are stocked and clean.
30 minutes before guests arrive:
- Walk the guest entry path from the car park or street to the ceremony space.
- Confirm ushers or greeters know their positions and have programmes or orders of service.
- Check all candles are lit (or battery candles are on) and no wax is pooling unsafely.
- Confirm the photographer and videographer are in position or on their way.
15 minutes before guests arrive:
- Do a photographic sweep: one photo of each zone from the guest’s perspective.
- Remove any remaining boxes, bags, or tools from guest-facing areas.
- Confirm the venue’s day-of contact has signed off on the setup.
- Hand the run sheet to your nominated point person and step away from coordinator mode.
The venue disaster prevention checklist from Adelaideweddingvenues covers additional final-check items that pair well with this routine.
How do you handle common setup problems on the day?
Problems during bump-in are normal. The couples who manage them well are the ones who have a plan before the problem arrives.
Late vendor: Call the vendor’s day-of mobile (not the office number) immediately. If they will be more than 30 minutes late, notify the venue contact and adjust the run sheet. Reorder other tasks so the team keeps moving rather than waiting idle.
Missing or damaged items: Open your tools and spares box first. Gaffer tape, cable ties, and floral wire solve a surprising number of problems. For a missing centrepiece component, a cluster of candles and greenery from another table can fill the gap. For a broken structural piece, contact the hire company’s emergency line, which should be on your contact list.
Power issues: Locate the venue’s switchboard before bump-in begins. If a circuit trips, reset it before assuming a fault. Spread high-draw items (fairy light strings, uplights) across multiple circuits rather than running them all from one point.
Bad weather (outdoor setups): Your contingency plan should be written before the day. Know which elements move indoors, which can be weighted or anchored, and at what wind speed you pull outdoor structures down. Confirm this plan with the venue in advance.
Pro Tip: Assign one person who is not in the wedding party as your day-of point person. Give them the run sheet, the contact list, and the authority to make small decisions without consulting you. This single step protects the couple from being pulled into logistics on their wedding day.
What should you ask your venue before the final walkthrough?
Venue managers see the same avoidable problems repeatedly. The questions below, drawn from comprehensive venue walkthrough guidance, are the ones that prevent day-of surprises.
Access and timing:
- What time does bump-in access begin, and is there a fee for early access?
- Is bump-out required the same night, or can items be collected the following morning?
- Is there a loading bay or service entrance, and what are its dimensions?
What the venue provides:
- Which tables, chairs, and linen does the venue supply, and what are the exact dimensions?
- Is AV equipment (microphone, PA system, projector) included or separately hired?
- Are there existing lighting rigs, and can you use them?
Rules and restrictions:
- What fixing methods are approved for walls and ceilings (command strips, gaffer tape, rigging points)?
- Are open flames permitted? If so, what are the requirements (holders, distances from fabric)?
- Are there noise restrictions or a hard finish time?
Staffing and logistics:
- Who is the named venue contact on the day, and what is their direct mobile number?
- Is a room flip required between ceremony and reception, and who manages it?
- Where can you store boxes and packaging during the event?
Sample email to send before your final walkthrough:
Couples searching for venues that clearly document what they supply versus what you bring will find the venue features guide from Adelaideweddingvenues a useful starting point.
A few honest lessons from planners who run DIY installs
The most consistent lesson from experienced planners is this: restraint produces better results than abundance. A room with three well-executed focal points photographs better than a room where every surface has something on it. Couples who edit their décor list down to what genuinely matters to them almost always feel better about the result.
Buy a test table’s worth of supplies before you commit to the full order. Set it up in your lounge room, photograph it, and live with it for a day. You will notice what is missing and what is unnecessary. This single step, recommended by DIY decor practitioners, reduces day-of risk more than any other preparation.
Assign a non-wedding-party point person and brief them thoroughly. The emotional weight of a wedding day is significant, and the couple should not be the ones chasing a missing centrepiece at 1:00 PM. A trusted friend or family member with the run sheet and the contact list can handle almost everything that comes up.
The most common emotional pitfall is perfectionism during bump-in. Something will not go exactly to plan. A candle will be the wrong height, a sign will lean slightly, a table will be missing a namecard. Experienced planners set a decision rule in advance: if a guest would notice it from their seat, fix it; if only the couple would notice, let it go and enjoy the day.
Sources
The sources below are worth bookmarking alongside this guide:
- Wedding Timeline Planning | In the Booth Blog
- How to Decorate a Wedding Step by Step: A Practical Guide
- DIY Wedding Styling Tips
- What Do I Ask at a Wedding Venue Walkthrough or Tour? — Elisabeth Kramer, Wedding Coordinator and Consultant
Before installing any décor, always confirm the venue’s rules around fixings, open flames, and structural attachments in writing. What is permitted varies significantly between venues, and verbal agreements are difficult to rely on when something goes wrong.
FAQ
How do you decorate a venue for a wedding event?
Start with lighting and a mapped floor plan, identify focal points, and install large structural items before furniture and table décor. Work from the ceiling down and from the perimeter inward, finishing with tablescapes and small details last.
What is the 30-minute rule for weddings?
The 30-minute check is the second stage of the pre-opening walkthrough: at 30 minutes before guests arrive, confirm ushers are in position, candles are lit, and the photographer is on site or en route. It is the last window to fix anything visible from a guest’s perspective.
How does a wedding usually go step by step?
A wedding typically follows: ceremony (processional, vows, recessional), cocktail hour or drinks reception, formal reception entry, entrées, speeches, main course, cake cutting, dancing, and farewell. The styling team’s job is to have each space ready before guests move into it.
How far in advance should you start styling a venue?
Major DIY items and hire bookings need 8–12 weeks of lead time. The floor plan and run sheet should be finalised four weeks out, packing completed one to two weeks before the event, and bump-in scheduled for the morning of or the evening before.
What is the biggest mistake couples make when styling a venue themselves?
Spreading effort across too many small items rather than focusing on two or three hero pieces. A few well-executed focal points create a cohesive, photographable result; many half-finished details create visual noise without adding to the overall feel.
